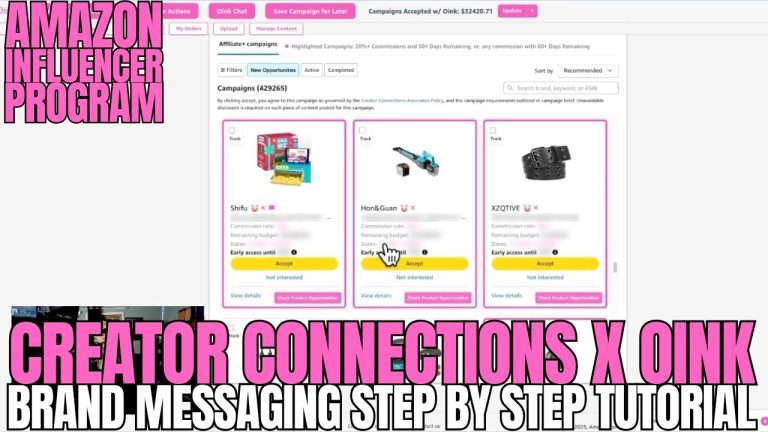
If you run Creator Connections campaigns, you already know the part nobody talks about: the video is the easy bit. It’s everything after the upload that quietly eats your commissions. You film the product, you upload it, and then you have to go find the campaign, submit your link by hand, and dig through the messaging center to tell the brand you posted. Every single time. I built Oink because I got tired of doing that — and I just rolled out a Pro feature that does the whole thing at the moment you upload.
Table of Contents
- The Problem This Actually Solves
- What the New Feature Does at Upload
- Step One: Set Up Your Oink Profile
- Step Two: Build Your Message Template Once
- What a Real Upload Looks Like
- What Happens When There’s No Campaign
- Repeat Brands and Multiple Products
- Who This Is For
- Recap
The Problem This Actually Solves
Here’s the honest truth about Creator Connections: most influencers skip half the follow-up steps. Not because they’re lazy, but because the workflow is genuinely tedious. You’ve got a campaign you accepted three weeks ago, you just filmed the product, and now you’re supposed to remember which campaign it belonged to, navigate back into the campaign, paste your post link, and then separately message the brand so they actually know you delivered.
When people skip those steps, two things happen. First, the campaign never registers your submission, so you don’t get credit for the work you already did. Second — and this is the one that costs more long term — the brand never hears from you. Brands hand out repeat campaigns and free products to creators they remember. If you’re invisible after the upload, you’re not on that list.
What the New Feature Does at Upload
The new Oink Pro feature hooks into the moment you upload. When you tag a product, Oink checks whether that product has a Creator Connections campaign you’ve already accepted. If it does, Oink shows you exactly which campaigns are still waiting on your link.
Then, with one answer from you, it does both jobs at once:
- Submits your post link to every campaign that needs it
- Sends the brand a personalized message about your new video
That’s it. No hunting through campaigns, no separate trip to the messaging center. The part of the workflow you were most likely to skip is now the part that happens automatically.
Step One: Set Up Your Oink Profile
Do this first. I want to be clear about the order, because people try to build the template before the profile and then wonder why their messages come out generic.
Your Oink profile is where you tell the system who you are as a creator — your name, your storefront, how you talk about your content. That information is what makes the auto-generated brand message read like a real person wrote it instead of a form letter. Fill the profile out once and every message you send afterward inherits it.
Step Two: Build Your Message Template Once
Next you create the upload and brand message template. This is a one-time setup, and it’s the whole reason the feature stays fast forever after.
You don’t have to write the message from scratch either — you can let Oink draft the brand message for you and then adjust the tone until it sounds like you. Inside the template, Oink auto-inserts the details that change on every upload:
- Product name
- Product ID
- Your post link
- The campaign it belongs to
Name it, save it, and you’re done. Set this up one time and it works on every upload after that.
What a Real Upload Looks Like
Once the template exists, the flow is short. You upload your video, Oink detects which accepted Creator Connections campaigns match the product you tagged, and it asks you whether to submit and message.
- Upload your video and tag the product as usual
- Oink checks your accepted campaigns for a match
- It shows you which campaigns still need your link
- You confirm — the link goes out and the brand gets messaged
- You get a confirmation that the link was added and the brand was contacted
You still get the final say on the message. Before anything sends, you can edit the auto-generated text. If there’s something specific about this particular video you want the brand to know, type it in. If the draft is already good, send it as-is. And if you’d rather not be asked at all, it works with auto-submit and close so the whole thing happens without another click from you.
What Happens When There’s No Campaign
Sometimes you film a product that doesn’t have a campaign you’ve accepted. Oink tells you that instead of failing silently — and if a campaign exists that you haven’t accepted yet, you can accept it right there on the spot and then submit. That’s a small detail, but it’s caught me real money. There’s nothing worse than finding out weeks later that the product you filmed had an open campaign you never joined.
Repeat Brands and Multiple Products
Two situations come up constantly once you’re filming at volume, and both are handled.
Repeat brands. If you’re posting for the same brand more than once, you don’t want to send them the identical message every time — that’s how you get ignored. You can customize the message for repeat sends so the brand sees a creator who’s paying attention, not a script.
Multiple products and multiple brands in one video. Comparison videos are some of the best content you can make for Amazon, but they’ve always been the worst for admin — three products can mean three campaigns and three separate brand messages. Oink handles multiple products and multiple brands on a single piece of content, submitting to each campaign that needs your link.
Who This Is For
This is an Oink Pro feature, and it’s built for Amazon influencers and affiliates who are actively running Creator Connections campaigns. If you’re filming one video a month, you can probably keep doing the manual version. If you’re uploading regularly and juggling several accepted campaigns at once, this is where the time and the missed commissions were hiding.
The outcome you’re chasing is straightforward: more free products, higher commissions, and brands that actually remember your name when the next campaign comes around.
Recap
Profile first, then template. That’s the order, and it’s the one thing I’d tell you to get right. Set up your Oink profile so the messages sound like you, build your upload and brand message template once, and from that point on every upload submits your links and messages the brand without you thinking about it.
Watch the full walkthrough below — I go through the template setup and a real upload start to finish:
If you want this running on your own uploads, grab Oink Pro at oinkforinfluencers.com. And if you’d rather earn from it, affiliates make 20% and your audience gets 10% off.