Facebook reels are getting a ton of attention right now, and for good reason. Between the monetization push and the sheer reach on that platform, a lot of Amazon influencers are sitting on a backlog of vertical storefront videos that could be working a whole lot harder for them. The problem has always been the manual labor of it — downloading, re-uploading, writing the post, pasting the link, adding the disclosure. That is a lot of friction for content you already made.
So I built the cross-posting into Oink. In this walkthrough I take my own vertical videos straight from my Amazon storefront and push them to Facebook reels — and to YouTube shorts at the same time — in real time. Then I show you exactly how to set it up on your own Pro subscription.
Table of Contents
- Finding Your Vertical Videos in the Cross-Posting Center
- The New Columns: Timestamps, Reels, and YouTube Status
- What To Do If Your Timestamps Are Missing
- Cross-Posting a Video to Facebook Reels and YouTube
- Setting Up Your Facebook Preferences
- Adding Your Link as a Comment
- Why This Matters for Your Backlog
Finding Your Vertical Videos in the Cross-Posting Center
Start on your Amazon storefront. Go up to Other Actions at the top and open the Content Cross-Posting Center. This is the hub for everything we are about to do.
What we are hunting for here are vertical videos, because that is what works on reels. A horizontal video is not going to do you any favors in a vertical feed. Oink now has a filter for exactly this — click the Vertical Videos button and it strips everything else out of view. Bam. Just like that you are looking at nothing but reels-ready content.
One heads up from the demo: a video can have a horizontal thumbnail and still be a vertical video. Do not let the thumbnail fool you. Click into the edit screen and you will see the actual aspect ratio.
The New Columns: Timestamps, Reels, and YouTube Status
Along with the vertical filter I added a couple of other things that make this a lot easier to work through.
- Timestamps. You can now see the duration of each video right in the list. With reels you generally want to be at or under about a minute, so being able to scan durations without opening anything saves real time.
- The Reels column. When it is lit up blue, that means you have already sent that video from Oink over to Facebook.
- The YouTube column. Same idea, same behavior, for YouTube shorts.
One important caveat on those blue indicators, and I want to be straight with you about it: the blue only confirms that Oink sent it. It does not confirm that the upload actually completed on the other end. If you killed the upload partway through for some reason, it will still show blue. So treat it as a “I already handled this one” marker rather than a guarantee of delivery.
What To Do If Your Timestamps Are Missing
Most of you should see everything populate automatically. But if you open the cross-posting center and your videos have no timestamps on them, here is the fix:
- Go up to Storefront Fetch and run Fetch Videos.
- If they still are not all pulling in, run Clear Stored Data first, then run the storefront fetch again.
- They will all pull in after that. Head back to Other Actions and you are good.
Cross-Posting a Video to Facebook Reels and YouTube
Filter to your verticals and look for anything that does not already have the dark blue indicators. Those are your untouched ones. Pick one and click the edit icon to open the edit screen.
You will notice a new bar at the top telling you where this video can be sent. If the product has geographic matches you will see buttons for Canada or the UK there. A lot of products — supplements especially — will not have any countries to cross-post to, and that is completely fine. It just means your destinations are the social platforms.
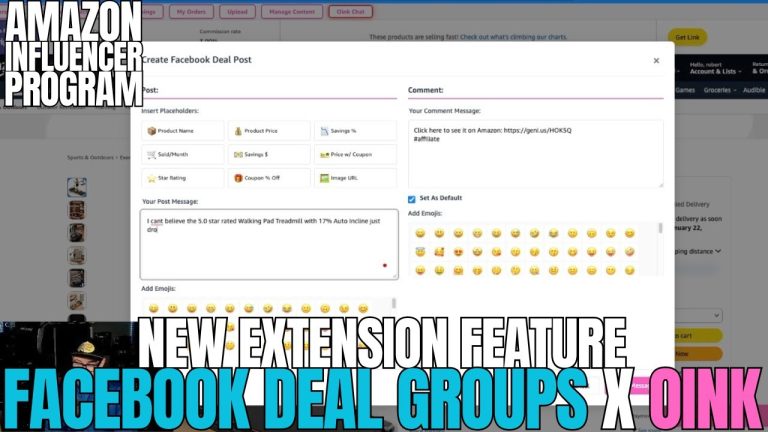
Select YouTube, select Reels, and click Send Selected. Oink opens both platforms and starts pushing the video from Amazon to each of them. On the Facebook side you will step through a short flow — click next, paste your deep link into the description, and confirm.
Here is a judgment call worth thinking about. Facebook will offer to let you tag the product directly. Sometimes I skip that, because I would rather not have a SiteStripe link competing with my deep link. I do not want to risk losing the click to a link that is not tracked the way I want it tracked. Your call on any given post, but be deliberate about it rather than clicking through on autopilot.
One thing that trips people up: the post button does not always turn blue immediately. The video still has to finish uploading to Facebook in the background. Give it a moment. As soon as it is done the button lights up, you click Post, and that one is live.
Setting Up Your Facebook Preferences
You probably noticed that when I clicked into those videos, a bunch of stuff was already filled in. That is because I have my defaults configured. Here is how you set yours.
You can do this from your storefront or from Creator Connections, either one works. Go to your Account, then Preferences. On the left-hand side there is a new Facebook section — expand it.
- Tracking ID. Do you have a specific tracking ID you want to use for Facebook traffic? I think you should. It is the only way you will ever know what Facebook is actually driving. If you leave it blank, Oink just uses your regular off-site store ID.
- Your post text. Keep it short. “See it on Amazon.” “Check it out on Amazon.” That is it. Oink drops the link in right after this line, so you do not need to write a paragraph.
- Your affiliate disclosure. Something basic like #affiliate #ad does the job. You choose where it lands, and my recommendation is the end of the description — that way it sits after your text and after the link.
- Genius Links group. If you run different Genius Links groups, you can assign one here. Mine is set so that whenever I select Facebook Reels, it automatically applies my Facebook reels tracking.
Fill it out, hit Save, and you are ready. And if you happen to jump into the cross-posting center before setting any of this up, the reels option will be grayed out — click it anyway and the settings box will appear right there on that screen so you can configure it without hunting for it.
Adding Your Link as a Comment
A lot of you have asked about getting the link into the comments too, not just the description. If you used Oink to create the reel and the link is already in the post, this is a one-click job.
Find the video, click Add My Link As A Comment, hit enter, and it is in. I usually wait for the link preview to populate before moving on. I am not sure that is strictly necessary — it is probably just me being paranoid — but it takes two seconds and I would rather see it land.
The nice part is this works retroactively. You can go back through your older reels that you posted with Oink and add the comment link to those too.
Why This Matters for Your Backlog
Here is the thing I want you to take away. You have already done the hard part. You found the product, you set up the shot, you filmed it, you edited it, you uploaded it to Amazon. That work is done and paid for. Every additional platform you put that same video on is close to pure upside.
There is a lot of attention on Facebook reels right now. If you have been looking for a way to take advantage of that, or you are already posting reels and you just needed a more efficient way to work through your existing content, this is it. Filter to verticals, work down the list, and knock out the ones that are not blue yet.
Finding products worth filming in the first place is the other half of the equation — that is what I built Oink for Influencers to do. The cross-posting center just makes sure the videos you already made keep earning.
Content cross-posting to Facebook Reels is available to Oink Pro subscribers. If you are not on Pro yet and this is the kind of thing that would save you hours a week, you can check out Oink here. To everyone already on Pro — thank you as always for the support. See you on the next one.